
CREATING A LEAD
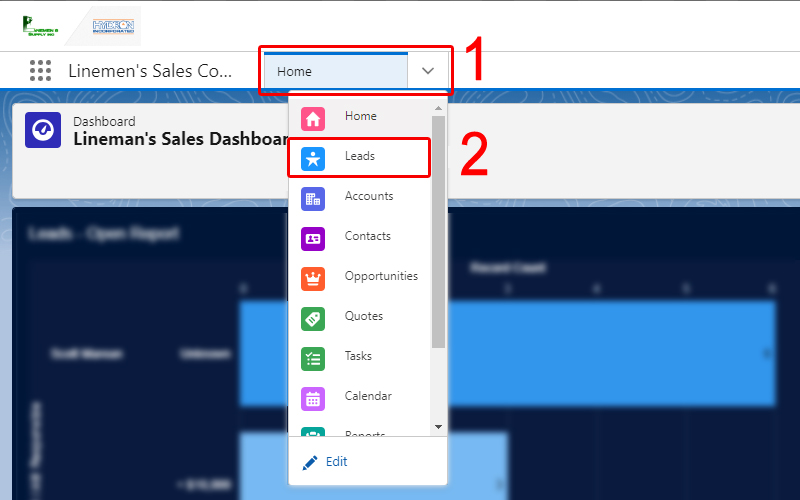
1. Navigate to the "Leads" list in Salesforce by clicking the drop down on the header navigation bar and selecting "Leads".
3. Fill out the new Lead form with as much pertinent information as you can provide. The fields marked with an * are required to continue.
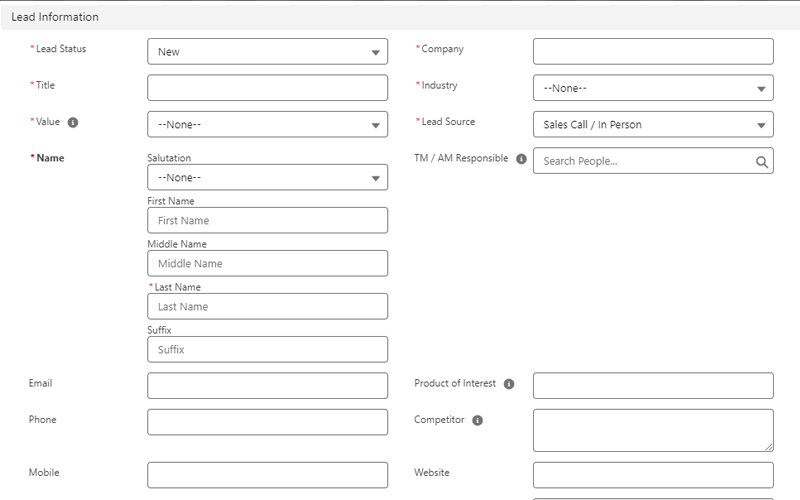
- The "Lead Status" should almost always be "New". It will default to this.
- Enter a meaningful Title to the Lead, something like "New Line School in Connecticut".
- Select a range for the estimated Value of the lead.
- Enter the Lead's Contact Information and name of the Company and Industry.
- Enter the TM / AM Responsible for the lead. This should be your name unless you are entering the lead for someone else.
- Be sure to add any other information you may have about the lead.
Don't worry if you don't have data for everything, it can be input later.
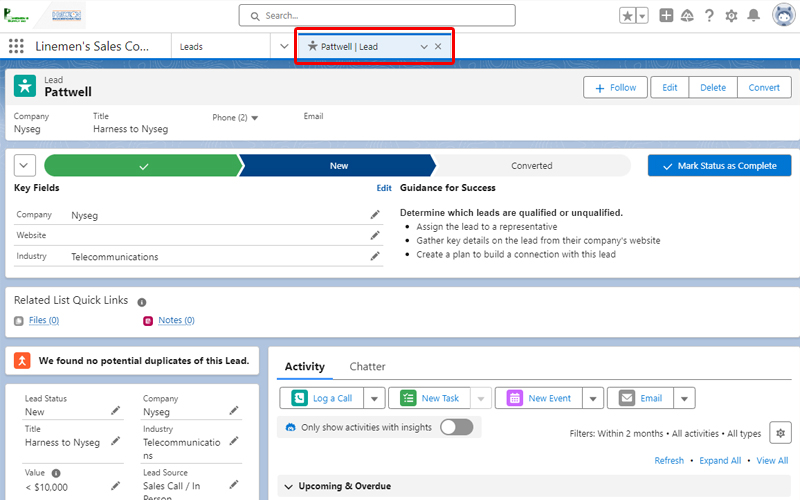
4. Save the Lead.
(Optional) Add A New Task for the Lead.
Don't just forget about your new lead!
Add a task as a reminder to follow up on this potential sales opportunity.
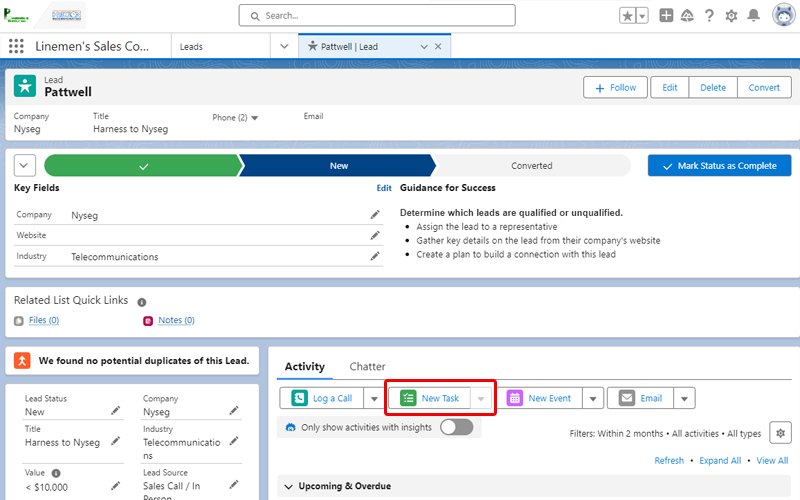
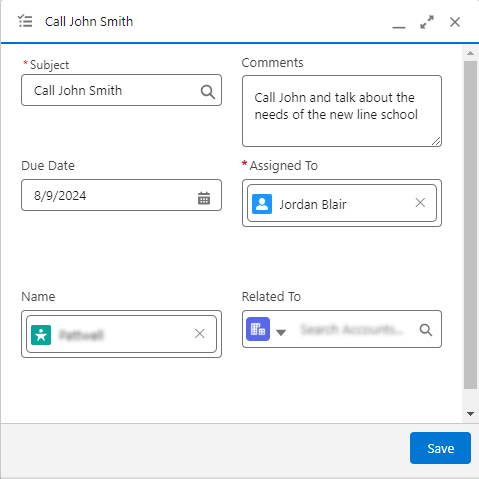
Enter a subject and any comments for the task.
Be sure to set a Due Date to stay on top of any tasks you create.
Save the task.