
CREATING AN OPPORTUNITY
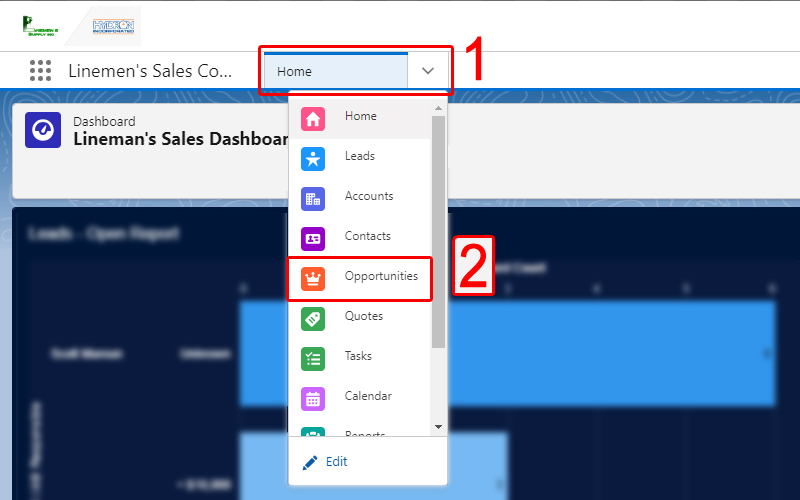
1. Navigate to the "Opportunities" list in Salesforce by clicking the drop down on the header navigation bar and selecting "Opportunities".
2. Select "New" in the top right corner of the Opportunity List.
3. Fill out the new Opportunity form with as much pertinent information as you can provide. The fields marked with an * are required to continue.
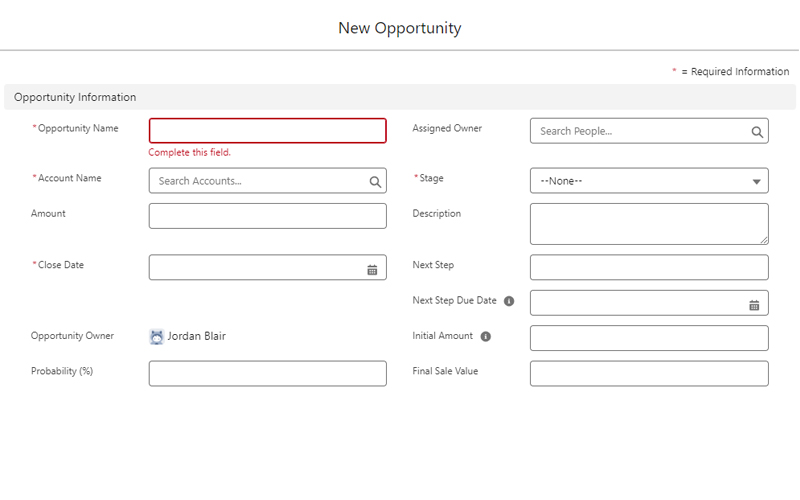
- Enter a meaningful Opportunity name.
- Fill in the Account Name for the opportunity, if the account doesn't already exist in Salesforce, create a new account for them.
- Enter an estimated Amount for the opportunity and set a forecasted Close Date.
- Unless you're entering this opportunity for someone else, make yourself the "Assigned Owner".
- The "Stage" should generally be set to "Opportunity", unless you are already at one of the other listed stages.
- Be sure to enter a helpful Description about the opportunity.
Don't worry if you don't have data for everything, it can be input later.
4. Save the Opportunity.
You should now be viewing the newly created opportunity in a new separate Salesforce tab.
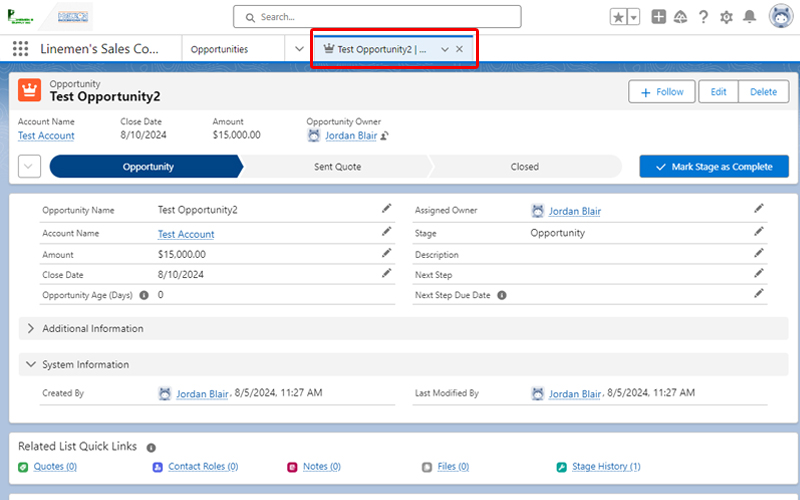
You can edit or add any information about the opportunity from this page or close the tab and return to the all "Opportunies" list view.
(Optional) Add A New Task for the Opportunity.
Don't just forget about your new Opportunity. Create Tasks, Events, and Log Activity!
Scroll to the bottom of the Opportunity page to view the 'Activity' section.
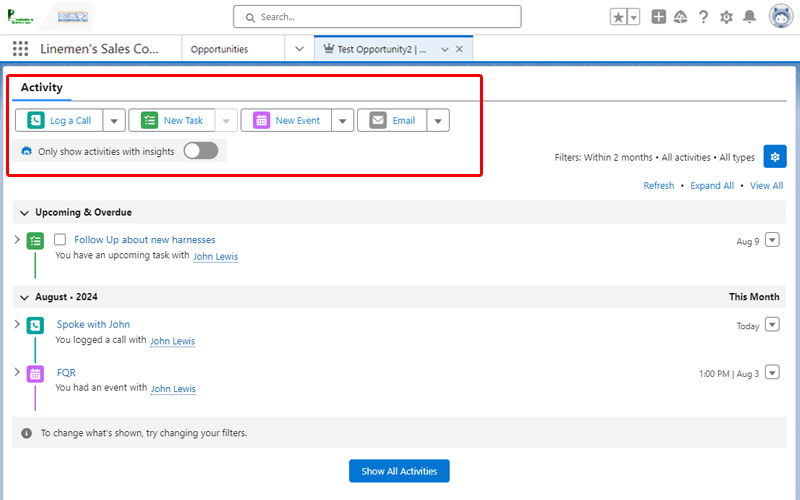
You can Log a Call, create a New Task, create a New Event, or send an Email directly from this Activity section.
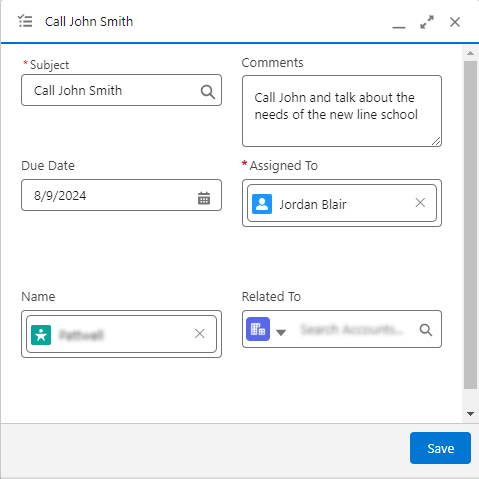
Enter a subject and any comments for the task.
Be sure to set a Due Date to stay on top of any tasks you create.
Save the task.